0️⃣ Routes 설정
Next.js의 Intercepting Routes와 Parallel Routes를 사용해서 버튼을 클릭하면 모달이 표출되고.
새로고침을 하거나 URL을 직접 입력해서 페이지를 접속했을 때에는 전체 페이지 형태의 화면을 보여주도록 하겠습니다.
이 방식은 사용자에게 보여줄 것이 있는 컨텐츠를 표출하는 경우에 유용하게 사용되지만 저의 경우에는 폼 등록 / 수정 페이지를 제작할 때 사용했습니다.
일반적으로 보여주는 페이지의 경로는 다음과 같이 정했습니다.
app
└── register
    └── [id]
        └── page.tsx
만약 새로운 데이터를 등록하기 위한 페이지 라면 /register/new 경로로 이동하여 새로운 데이터를 입력할 수 있도록 하고,
데이터를 수정하기 위한 페이지라면 /register/1 경로로 설정되도록 라우팅을 세팅하였습니다.
그 다음으로 @modal 이라는 이름의 Slot을 만들고, Intercepting routes를 설정합니다.
app
└── @modal
    ├── (.)register
    │   └── [id]
    │       └── page.tsx
    └── default.tsx
slot을 만들었으니 RootLayout 컴포넌트에서 children을 받아 렌더링 해줍니다.
export default function RootLayout({
  children,
  modal,
}: Readonly<{
  children: React.ReactNode;
  modal: React.ReactNode;
}>) {
  return (
    <html lang="ko">
      <body>
        {children}
        {modal}
      </body>
    </html>
  );
}
1️⃣ 모달 구현
등록 버튼을 클릭했을 때 모달 형태로 표출하기 위한 컴포넌트를 제작하겠습니다.
우선 공통적으로 사용되는 모달을 제작한 후 페이지를 표출할 때 사용될 모달을 제작해주겠습니다.
// 공통 Modal
const Modal = ({ ref, className, onCancel, children }: ModalProps) => {
  return createPortal(
    <dialog
      className={cn(
        "flex flex-col gap-6 bg-white",
        "rounded-2xl border border-gray-200",
        "shadow-[0_16px_32px_-4px_rgba(12,12,13,0.1)]",
        className
      )}
      ref={ref}
      onCancel={onCancel}
    >
      {children}
    </dialog>,
    document.body
  );
};
공통 모달을 사용하여 페이지를 표출할 때 사용되는 모달을 제작하겠습니다.
// PageModal
interface PageModalProps {
  title: string;
  children: ReactNode;
  className?: string;
}

const PageModal = ({
  title = "등록 하기",
  children,
  className,
}: PageModalProps) => {
  const modalRef = useRef<HTMLDialogElement>(null);
  const router = useRouter();

  const handleCancel = (e: Event) => {
    e.preventDefault();
  };

  const handleCancelEsc = (e: KeyboardEvent) => {
    if (e.key === "Escape") {
      router.back();
      e.preventDefault();
    }
  };

  useLayoutEffect(() => {
    const currentScrollY = window.scrollY;
    lockingScroll(currentScrollY);

    return () => {
      allowScroll(currentScrollY);
  }, []);

  useEffect(() => {
    if (!modalRef.current?.open) modalRef.current?.showModal();

    if (modalRef.current) {
      modalRef.current.addEventListener("cancel", handleCancel);
      modalRef.current.addEventListener("keydown", handleCancelEsc);
    }

    return () => {
      modalRef.current?.removeEventListener("cancel", handleCancel);
      modalRef.current?.removeEventListener("keydown", handleCancelEsc);
    };
  }, [modalRef]);

  return (
    <Modal
      ref={modalRef}
      className={cn(
        "h-[738px] border-none px-6 tablet:relative pc:relative",
        "mobile:bottom-0 mobile:left-0 mobile:right-0 mobile:mb-0 mobile:w-full mobile:max-w-full",
        "mobile:rounded-none mobile:rounded-t-2xl",
        "tablet:h-[1010px]",
        "pc:h-[1010px]",
        className
      )}
    >
      {/* 모달 상단 영역 */}
      <div className="sticky top-0 z-10 flex w-full items-center justify-between bg-white pt-8">
        <p
          className={cn(
            "text-default mobile:text-heading-md",
            "tablet:text-heading-lg",
            "pc:text-heading-lg"
          )}
        >
          {title}
        </p>
        <IconButton
          icon="XIcon"
          iconSize={"lg"}
          iconColor="gray300"
          aria-label="모달 닫기"
          className="h-[24px] w-[24px] border-none focus:outline-none tablet:h-auto tablet:w-auto pc:h-auto pc:w-auto"
          onClick={() => router.back()}
          autoFocus={false}
        />
      </div>
      <div className="mobile:h-[526px] tablet:h-[764px] pc:h-[764px]">
        {children}
      </div>
    </Modal>
  );
};

export default PageModal;
이 모달을 사용한 페이지가 백드롭 부분에서 스크롤이 되지 않도록 useLayoutEffect()훅을 통해 마운트 되기 전에 스크롤을 막아줍니다.
그리고 dialog의 ESC 동작에 이전 페이지 이동을 위해서 useEffect()훅 안에 이벤트 리스너를 추가하여 각 동작별로 이벤트를 수행하도록 하였습니다.
클릭했을 때와, ESC 키를 눌렀을 때의 이벤트 타입이 달라 이벤트 리스너를 사용하였습니다.
2️⃣ 등록 / 수정 모달 제작
이제 등록과 수정 역할을 수행하는 페이지를 모달로 제작합니다.
Intercepting routes에서 현재 URL을 가져오는 방법은 일반 페이지에서 가져오는 방법과 동일하게 params 파라미터로 가져올 수 있습니다.
const Page = async ({ params }: { params: Promise<{ id: string }> }) => {
  const { id } = await params;
  let wineData = null;

  if (Number(id)) {
    const data = await getRegisterWine(id);

    if (data) {
      wineData = data;
    }
  }

  return (
    <PageModal>
      <RegisterWine wineData={wineData} id={id} />
    </PageModal>
  );
};
위에서 말한 것 처럼 등록 페이지는 /register/new 경로로 접속합니다.
따라서 new라는 문자열을 params로 가져오게 된다면 getRegisterWine(id) 메서드로 등록되어있던 와인을 가져오는데 실패하게 됩니다.
<RegisterWine /> 컴포넌트에 wineData prop으로 null값을 전달하게 되고 이는 등록페이지가 됩니다.
이미 등록되어 있던 데이터를 수정할 때의 URL은 /register/1 형태로 되고 id가 '1'인 데이터를 가져오고
<RegisterWine /> 컴포넌트에 전달하여 해당하는 데이터를 표출하게 됩나다.
<RegisterWine /> 컴포넌트 내부에서도 wineData가 없을 경우에는 등록 API를 호출하고, 있다면 수정 API를 호출합니다.
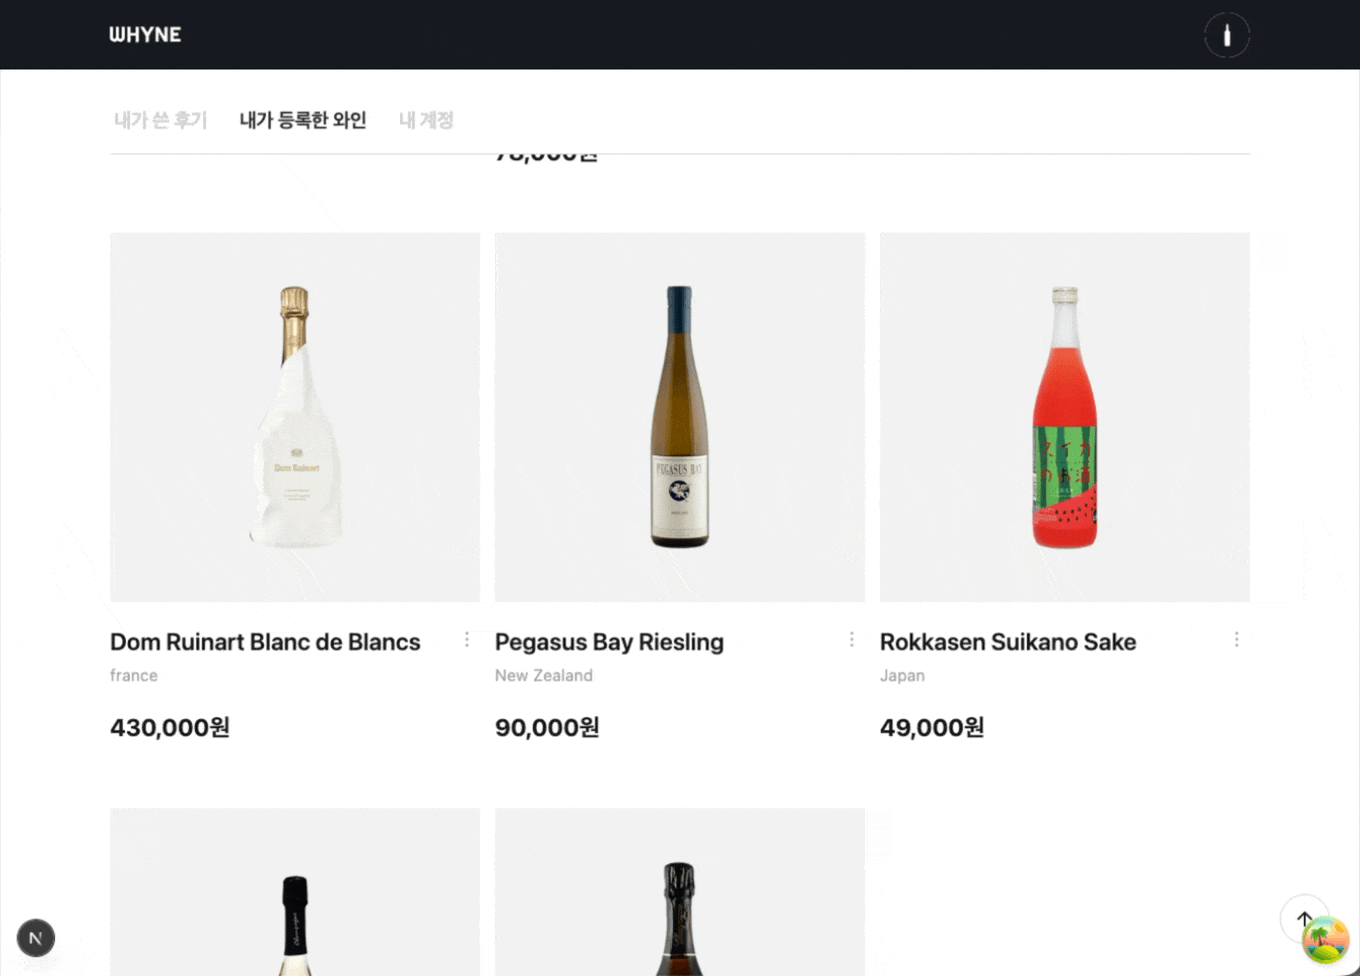
등록 화면
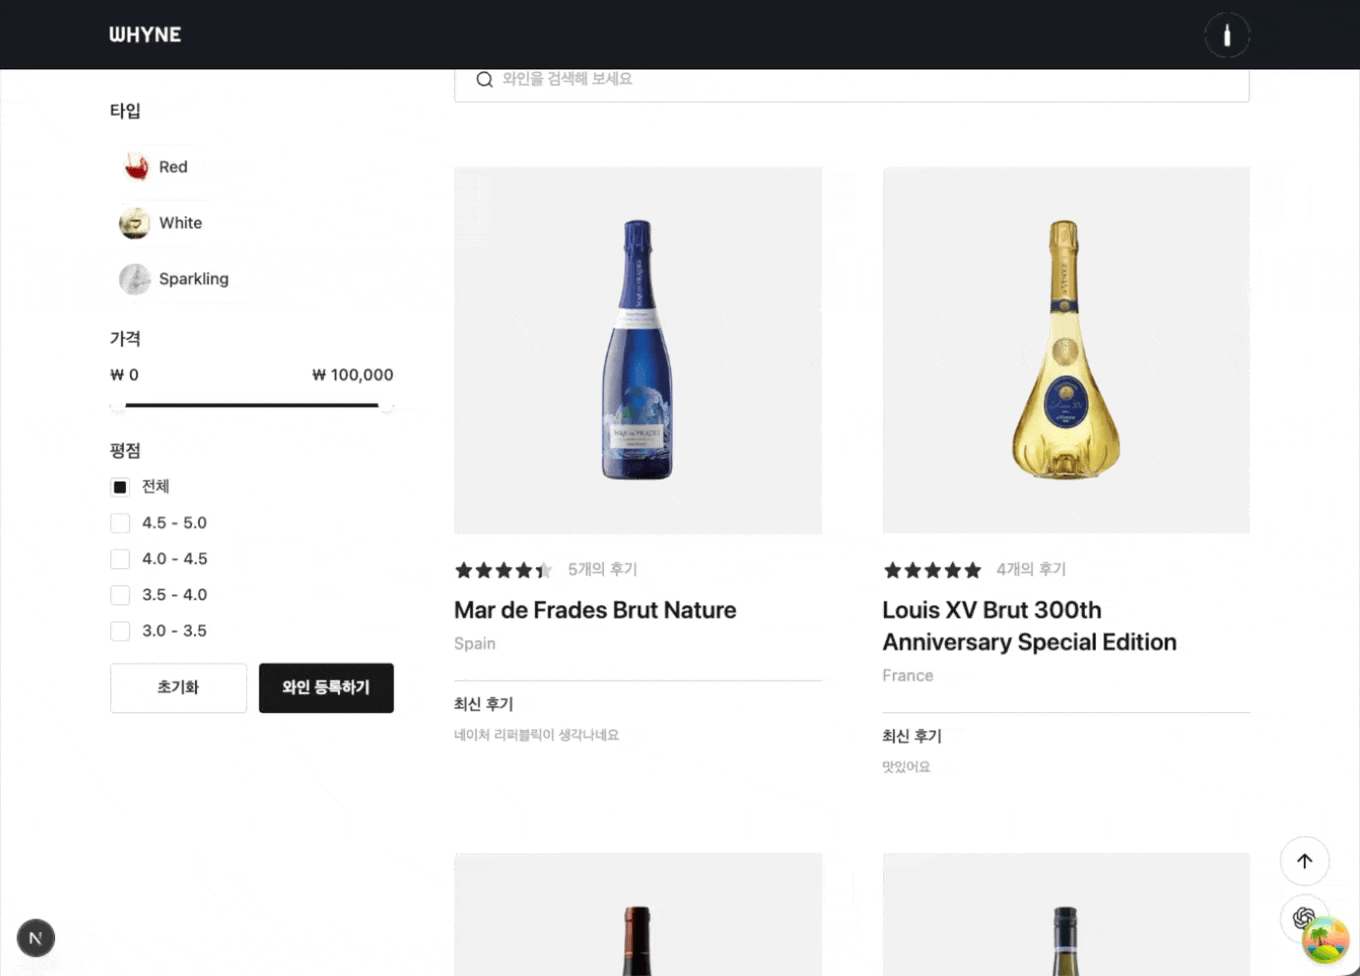
수정 화면